

.
The Web of Fear is the fifth serial of Season 5 of the classic Doctor Who television series. Originally broadcast in six weekly episodes from 3 February to 9 March 1968. It was written by Mervyn Haisman and Henry Lincoln and directed by Douglas Camfield. It stars Patrick Troughton as the Doctor, Frazer Hines as Jamie McCrimmon, Deborah Watling as Victoria Waterfield, Nicholas Courtney as Colonel Lethbridge-Stewart, Jack Watling as Professor Travers, and Tina Packer as Anne Travers.
It is also notable for the first appearance of Colonel Lethbridge-Stewart, later Brigadier and head of UNIT, played by Nicholas Courtney. For many years, five of the six episodes were missing, but most were recovered, reconstructed and animated.
Episode 1
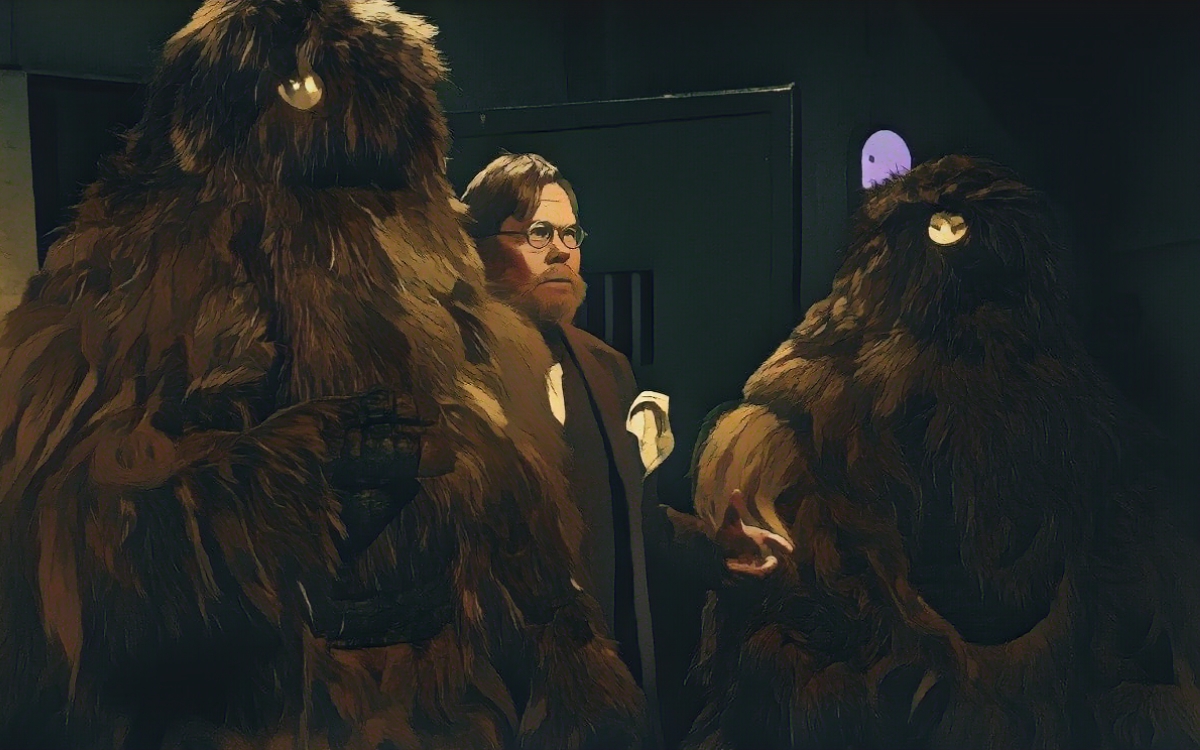
The TARDIS shudders as a sticky, glowing web wraps around it in space. It breaks free and lands in a silent London Underground station, dust thick on the platforms, posters torn, ticket booths abandoned. The Doctor, Jamie, and Victoria follow faint boot prints and find a smashed kiosk webbed with a fibrous fungus. A furry giant steps from the shadows (a Yeti) but this one is metal under its pelt, and it sprays the tunnels with expanding web.
Soldiers appear and drive it off with grenades, then hustle the traveller’s through barricades to a sealed command post at Goodge Street. Inside are Captain Knight, Staff Sergeant Arnold, a jittery driver named Evans, a smug TV journalist, Chorley, and an elderly scientist the Doctor knows well: Professor Travers, decades older and burning with guilt.
He admits his past research let the Yeti’s master (the bodiless Great Intelligence) find Earth again. Travers’s daughter, Anne, cool-headed and brilliant, shows the Doctor a pinging control sphere they’ve retrieved; it hunts for a Yeti chest cavity like a homing heart. The Intelligence has flooded the network, cutting London into islands. The Doctor asks for a captured Yeti and a map. If they can learn the web’s pattern, they may survive until morning.
Episode 2
Recon teams slip out to test routes to Holborn, Covent Garden, and Piccadilly. Every path fills with fungus as if the tunnels are breathing; men vanish between one breath and the next. The Doctor studies the control sphere and confirms his fear: the Yeti are remote-driven robots, and the webbing is a conductor: a growing nervous system for the Intelligence. He proposes turning a sphere into a transmitter he can control.
Knight wants firepower; Anne argues for brains; Travers stares at the walls and hears a whisper no one else does. In the tunnels, Jamie and a squad retrieve a damaged Yeti for the Doctor’s experiments, while Victoria helps Anne fortify the HQ and winces through Chorley’s insinuations that the strangers are saboteurs. Evans returns alone from a run, shaking, swearing the fungus moved to block him like a living tide.
A sudden surge batters Goodge Street; web pours under doors, hardens, then retreats, testing the seal. The Intelligence speaks through a Yeti at the barricade: surrender the Doctor. Travers begs them not to listen; his voice shifts halfway through the plea, and the Doctor hears another mind riding it. He works faster, soldering and splicing. If he can wake a Yeti to his will, they’ll have one ally underground.
Episode 3
A new commander arrives through the smoke: Colonel Lethbridge-Stewart, cool under pressure, taking bearings with a glance. His relief column is missing; he suspects an ambush, maybe a traitor feeding the Intelligence their movements. The Doctor finishes modifying a sphere and tests it against the captured Yeti. The lights flicker, the unit twitches, then a second, unseen pulse overrides his signal and the thing slumps dead.
Someone close is shifting the pieces. Lethbridge-Stewart splits the survivors into teams: one to fetch explosives, one to scout a route to the surface, one to carry the Doctor to a power room he needs for his equipment. Chorley slips away, promising to “bring help.” Arnold volunteers for every task, practical and unreadable. In the dark, Jamie and Evans stumble upon a store of fresh spheres rolling like beetles toward the front. They smash what they can, but one darts away.
The Intelligence speaks again, through Travers’s lips, offering safe conduct for the Doctor to meet and “negotiate.” The Doctor agrees, to stall, and gives Jamie secret instructions: if he disappears, trigger the device he’s hidden in the Yeti’s chest. Lethbridge-Stewart marks the map with pins. A wrong turn here, a sealed gate there: the pattern begins to look like a snare.
Episode 4
Teams move, and are hit. A web flood cuts off the explosives party; only Evans limps back, wild-eyed. At Covent Garden, a rank of Yeti steps from fog and massacres an advance squad. Lethbridge-Stewart fights to keep order as radios fill with static and screams. The Doctor and Anne jury-rig a guide using the tunnels’ signal cables, trying to read where the web is strongest.
Travers recovers enough to confirm a control locus near Piccadilly Circus; then his gaze goes distant again, and he walks toward a waiting Yeti as if sleepwalking. Jamie drags him back. Inside HQ, Victoria keeps spirits up and spots Chorley attempting to open a blast door; he bolts, convinced the army will scapegoat him if he stays. The Doctor finally gets a controlled Yeti to take one slow step on his command, proof the override can work, and hides the obedient unit amid the dead.
Colonel Lethbridge-Stewart orders a two-pronged push to break the ring around them. Staff Sergeant Arnold leads one column and vanishes into a wall of fungus that seals behind him like closing lips. As night crushes the tunnels, the web pulses faster, and the pins on the Doctor’s map rearrange themselves, not by his hand. Someone inside has moved them.
Episode 5
The Intelligence stops asking and starts dictating. Speaking through Travers, it offers a bargain: the Doctor will come alone to its machine, submit to a “transfer,” and the others will be spared. Anne deciphers enough of the plan to make the Doctor blanch. The Intelligence wants to drain his knowledge, his experiences, his will, leaving a living husk.
Lethbridge-Stewart refuses the trade; the Doctor insists he must go, and quietly rewires a headframe so the flow will reverse at the last second. Knight escorts Victoria and Anne to place charges on a key junction; Yeti pour from the cross-passages, and Knight dies buying them time. Chorley blunders into Piccadilly and is herded by Yeti back toward the lair, where a man steps from the fungus: Arnold, bland and smiling, skin dusted with glittering threads.
He “escorts” Victoria to the Intelligence, promising it will all be over soon. Lethbridge-Stewart gathers his last handful of men for a final assault. Jamie takes the control sphere and prepares the hidden Yeti for a rescue. The Doctor walks into the Intelligence’s chamber (a humming webbed arch, cables knotted like veins) lays his hands on cold metal, and asks one favour: that Travers be freed once this is done. The Intelligence chuckles and lowers the crown.
Episode 6
Webbing tightens around the Doctor’s temples as the machine starts. Lethbridge-Stewart’s assault hits from two sides and collapses under a Yeti counterattack. Anne and Victoria struggle free of guards and spot the obedient Yeti waiting stone-still for Jamie’s word. Arnold steps into the light at last, voice cool with borrowed power; the Intelligence has worn him like a glove since the tunnels closed around him.
Jamie shouts the command. The friendly Yeti crashes through the chamber wall, scattering its kin. The Doctor’s fingers, already set on hidden switches, twitch: he has inverted the flow so the Intelligence will be drawn into him instead. Jamie, not knowing, panics and smashes the control rods to save him. The circuit breaks. The Intelligence howls and flees up the web, tearing itself away. The machine dies; the fungus slackens throughout the network.
Yeti freeze where they stand. Arnold staggers, empty, and falls. Lethbridge-Stewart regroups what’s left of his men and offers terse thanks. Travers wakes fully, ashamed and grateful; Anne shakes the Doctor’s hand, already planning a paper. Chorley sidles back, ready to sell an exclusive, and is met with a dozen withering looks. The travellers slip away to an unwebbed platform where the TARDIS waits, a blue box in the dust. London breathes again in the echoing tunnels.
Themes
As a pinnacle of the “base-under-siege” formula, The Web of Fear ranks just a breath below the absolute giants. Less mythic than The Tomb of the Cybermen but tighter and more viscerally staged than The Abominable Snowmen. The suffocating tunnels, webbed choke points, and Patrick Troughton’s wary, watchful Doctor make it one of Season 5’s standouts, shoulder-to-shoulder with The Invasion for sheer atmosphere and modern feel.
Among siege tales it sits comfortably alongside The Moonbase and Fury from the Deep, with the Yeti-in-the-Underground imagery earning a place in the series’ iconography.
Linking past to future, it pays off the Great Intelligence thread from The Abominable Snowmen and clears the path to the UNIT era by introducing Colonel Lethbridge-Stewart, whose journey continues through The Invasion and blossoms in Spearhead from Space. Its urban paranoia and military coordination echo forward to Inferno and Terror of the Zygons, while the Intelligence’s long game resurfaces in The Snowmen, The Bells of Saint John, and The Name of the Doctor.
From here, the TARDIS team steps into Fury from the Deep, but the legacy of these shadowed tunnels carries far beyond: into decades of Earthbound conspiracies and the Doctor’s enduring alliance with UNIT.

.
This is a chapter from Craig Hill’s book “Doctor Who – The Second Doctor”, chronicling every episode featuring the Second Doctor. It is available on Amazon.
.
To view the list of other Doctor Who serials, please click this link
Doctor Who Episode Guides for Sale on Amazon
Step aboard the TARDIS and journey across the universe with every incarnation of The Doctor in this series of unofficial Doctor Who episode companions.
This collection of twelve books explores every televised adventure of the Time Lord’s lives.
Each volume in the series delves into a different Doctor’s era, offering detailed episode guides, behind-the-scenes insights, character profiles, and story synopses.
Once you have clicked the link, choose which book you want, and then whether you want to buy the Kindle (eBook) or Paperback versions.
Previews are available before you buy.

Visit the Australian Book and Language Studio
Discover more from Craig Hill
Subscribe to get the latest posts sent to your email.
